
How to Disassemble a Bunk Bed: A Step-by-Step Guide
Posted by Posted by Just Bunk Beds on Sep 16th 2026
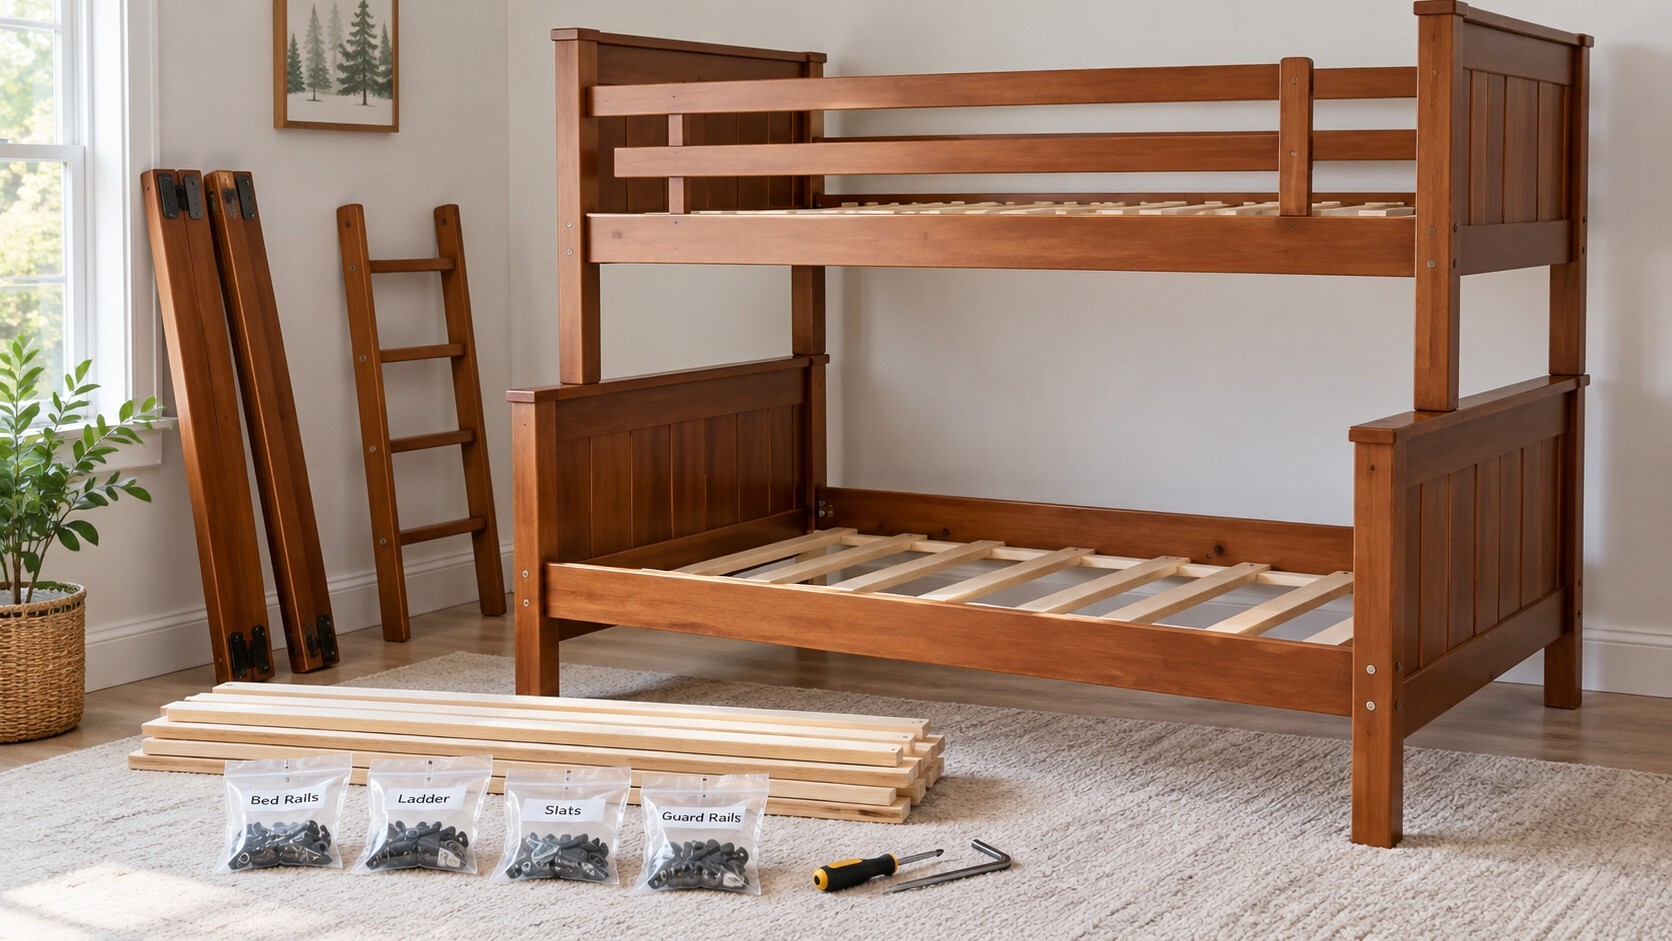
Whether you're moving to a new home, rearranging a bedroom, replacing flooring, or putting a bunk bed into storage, there may come a time when you need to take it apart.
Disassembling a bunk bed is generally easier than assembling one, but it still needs to be done carefully. Bunk beds are large, heavy pieces of furniture, and removing components in the wrong order can place unnecessary stress on the bed rails, hardware, or connection points.
The exact process varies by manufacturer and bunk bed design, so always refer to the assembly instructions supplied with your bed when available. In most cases, however, a bunk bed can be safely disassembled by working in essentially the reverse order in which it was assembled.
Before You Start
Before removing any hardware, clear enough space around the bunk bed to work comfortably.
Remove the mattresses, bedding, pillows, and anything stored underneath the bed. If the bunk bed has a trundle or removable under-bed storage drawers, remove those as well.
You will also want to have a few basic items nearby:
- The original assembly instructions, if available
- The appropriate Allen wrench, socket, or screwdriver
- Small labeled bags or containers for bolts and hardware
- Painter's tape or removable labels
- Moving blankets or cardboard to protect finished wood components
For larger wood bunk beds, having a second adult available is strongly recommended. Upper bunk assemblies, headboards, footboards, and long bed rails can be heavy and awkward to handle alone.
Step 1: Remove the Ladder and Other Accessories
Start by removing components that project outward from the main bunk bed frame.
Depending on the bunk bed, this may include a straight or angled ladder, storage staircase, removable guard rails, or other accessories.
Removing these components first gives you more room to work and reduces the chance of accidentally placing weight or pressure on them while taking apart the main bed.
If your bunk bed has storage stairs, follow the manufacturer's instructions for disconnecting the staircase from the bunk bed. Do not attempt to pull or twist the stairs away from the bed while they are still attached.
Step 2: Remove the Slats
Once the mattresses and accessories have been removed, take out the mattress-support slats from both bunks.
Some bunk beds use loose slats, while heavier-duty models may have slats that are screwed into the side rails and center support beams. Remove any screws or fasteners before attempting to lift those slats out.
Keep the slat screws and other small hardware together and label them. This simple step can save considerable time when the bunk bed is assembled again.
If your bunk bed uses center support beams, leave them in position until the slats have been removed.
Step 3: Separate the Upper and Lower Bunks
Many wood bunk beds are constructed as two individual bed assemblies that are stacked and connected using metal pins or another joining system.
Before attempting to lift the upper bunk, check carefully for any bolts, brackets, or other hardware securing the two beds together.
With one adult positioned at each end, carefully lift the upper bed vertically until it clears the connecting pins or hardware. Move it to an open area where it can be safely disassembled.
Never try to separate the bunks with mattresses, slats, or other unnecessary weight still on the frame.
Step 4: Remove the Bed Rails
This is one of the steps where a little patience can prevent damage.
Bed rails may be connected to the headboards and footboards with bolts, hook-style hardware, metal brackets, or a combination of connection methods. Determine how your particular bed rails are attached before applying force.
Loosen or disengage the hardware according to the manufacturer's instructions and support the weight of the rail as it is removed.
A Note About Austin, Gary and Dillon Bunk Beds
On Austin, Gary and Dillon bunk beds, the metal bracket attached to the bed rail is designed to stop approximately 1/8 inch short of the end of the wooden rail. This small gap is intentional and is important to achieving a tight, stable connection. See the image below for an example of the intentional 1/8-inch gap between the metal bracket and the end of the wooden rail..
When assembling or reassembling the bed, first make sure the end of the wooden bed rail makes full contact with the headboard or footboard. Once the wooden rail is properly seated, tighten the bolts that secure the metal bracket. As the bolts are tightened, the flat face of the bracket will draw securely against the headboard or footboard, locking the rail firmly into position.
Do not position the metal bracket flush with the end of the wooden rail. If the bracket extends all the way to the end of the rail, it can make contact with the headboard or footboard before the wooden rail does, preventing a tight wood-to-wood connection and potentially causing the bunk bed to wobble.
The correct sequence is: seat the wooden rail firmly against the headboard or footboard first, then tighten the bracket bolts until the bracket is securely engaged.
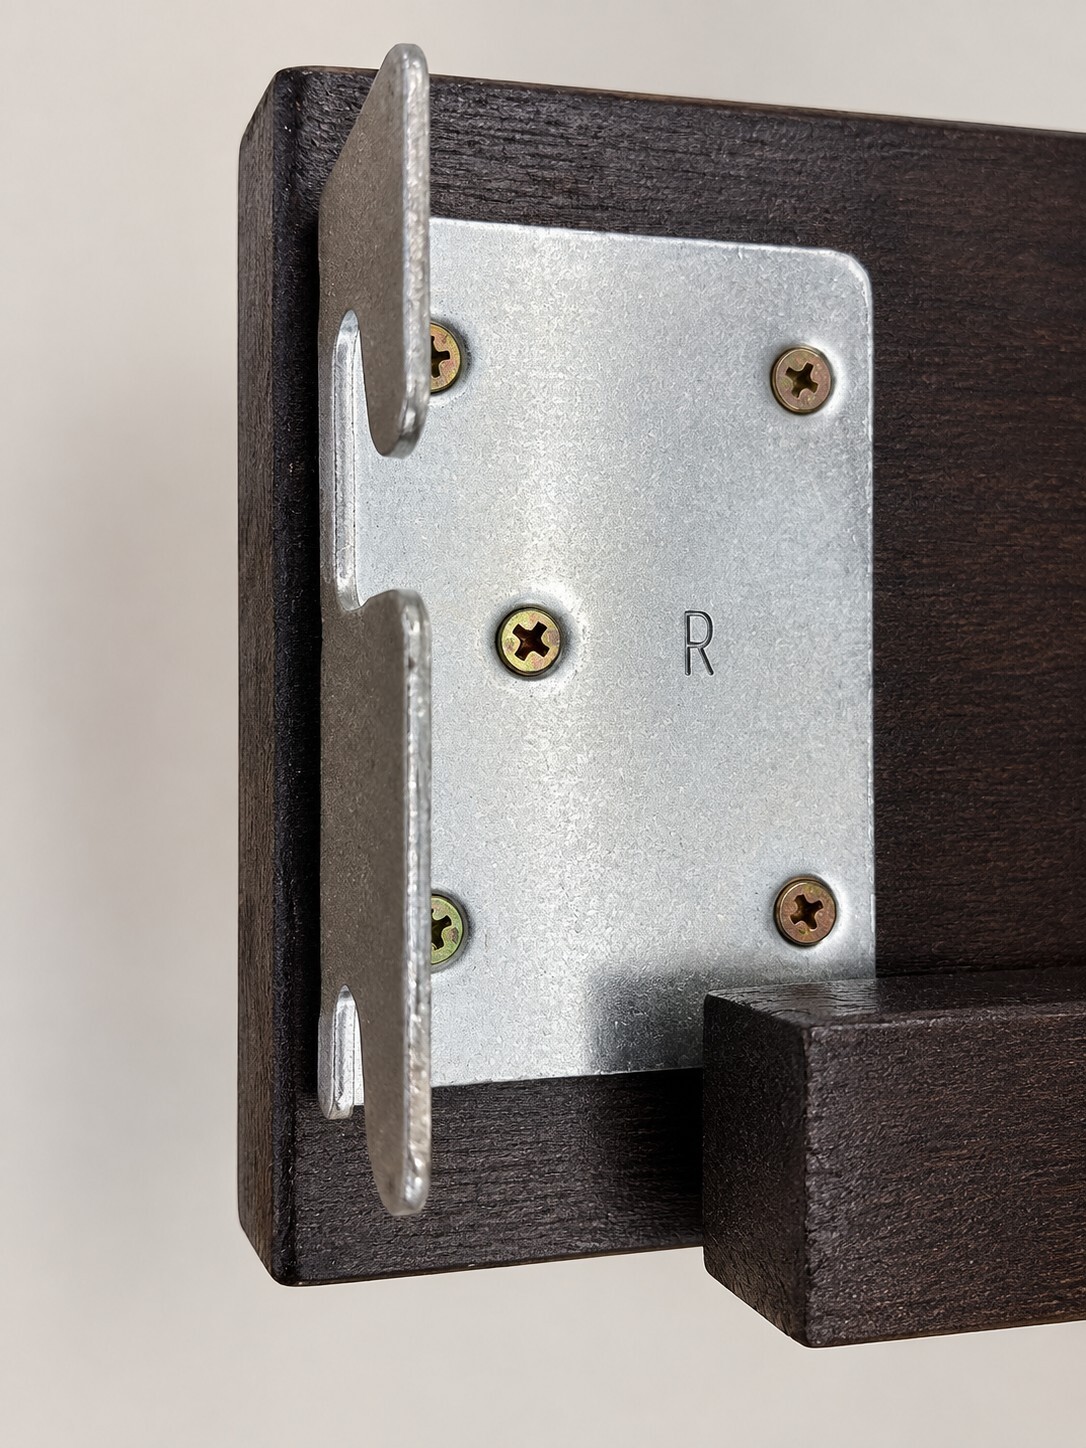
The metal bracket stops approximately 1/8 inch short of the end of the wooden bed rail. This intentional gap allows the wooden rail to make full contact with the headboard or footboard before the bracket is tightened.
Step 5: Organize and Label the Hardware
One of the most common problems when reassembling furniture isn't taking it apart, it's figuring out where all the hardware goes afterward.
Place bolts, screws, pins, washers, and other hardware into labeled bags as you work. Rather than putting every piece of hardware into one container, separate it by component whenever possible.
For example, keep ladder hardware, bed-rail hardware, guard-rail hardware, and slat screws in separate labeled bags.
If you are moving the bunk bed, tape each sealed hardware bag securely to the corresponding component or place all of the labeled bags together in a clearly marked box.
Step 6: Protect the Components for Moving or Storage
Wood bed rails, headboards, ladders, and guard rails can easily become scratched when stacked against one another.
Use moving blankets, cardboard, foam, or other protective material between finished surfaces. Pay particular attention to corners, bedposts, and the ends of the rails where the connection hardware is located.
Avoid placing heavy items on top of long wooden bed rails during transportation or storage. Rails should be supported so they are not subjected to unnecessary bending or twisting.
Do You Need to Completely Disassemble a Bunk Bed?
Not always.
If you're simply moving the bunk bed to another room or transporting it locally, it may be possible to separate the bunk into two individual beds and remove the side rails without taking apart the headboards and footboards.
In fact, if the headboards or footboards arrived from the manufacturer fully assembled, there is generally no reason to disassemble those components further.
The goal should be to take the bunk bed apart only as much as necessary to move, transport, or store it safely.
Take Photos Before and During Disassembly
A few photographs taken with your phone can make reassembly considerably easier.
Before removing anything, photograph the complete bunk bed. Then take close-up photos of important connection points, including bed-rail brackets, ladder attachments, guard rails, center supports, and any hardware whose orientation may be difficult to remember later.
These photographs can be especially helpful if the bed will remain in storage for several months before being assembled again.
Reassembling the Bunk Bed
When you're ready to put the bunk bed back together, don't rely solely on remembering how you took it apart.
Follow the manufacturer's assembly instructions, confirm that all hardware is present, and inspect the bed components and connection points before assembly. Tighten the hardware according to the manufacturer's directions and verify that the bunk bed is stable before replacing the mattresses.
If the bunk bed has been moved or stored for an extended period, this is also a good opportunity to inspect the slats, guard rails, ladder, rail connections, and other structural components.
Final Thoughts
Taking apart a heavy duty bunk bed doesn't have to be difficult. The key is to work methodically, remove components in the proper order, protect the furniture as you work, and keep the hardware organized for reassembly.
Most importantly, don't force a component that doesn't want to come apart. Stop and determine how it is connected before pulling, twisting, or prying against the wood.
A little extra care during disassembly can prevent damaged hardware, scratched finishes, and unnecessary frustration when it's time to put the bunk bed back together.